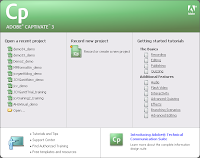
 While attending the NECC Conference this summer in San Antonio I had the chance to stop by the Adobe booth and connect with some of my colleagues who work for Adobe to find out what is the latest and greatest. At the Adobe booth I was shown several of the new releases which included Captivate 3, Adobe Acrobat 9 Professional, and Presenter 7. One of the Sales Engineers gave me a tour of Captivate 3 which really wowed me. Many of you know that I have been producing software video tips and tutorials for the past year or so for the Mindjet Newsletter which goes a long way for showing others how to accomplish tasks using MindManager 7 and JCVGantt Pro 3. Using screencasting software to demonstrated how to accomplish tasks with a particular software product makes the process of providing "just in time training" a reality and can cut down on support calls at the workplace. I want to thank Jody at A&R Edelman for providing me with a copy of Adobe captivate to review and to RJ at Adobe for doing a great webinar with me on Adobe Captivate 3.
For the past several years I have been using Camtasia Studio 5 extensively to do my screencasting work and find it to be an outstanding product to get my work done. Camtasia Studio 5 lets you record your screen and then provides you with post editing tools to fine tune your screencast. Camtasia's approach to screencasting is similar to that of taking a video camera and pressing the record button. With this approach every screen and all of the audio is continuously being recorded. Any mishaps or errors while doing the recording will need to be post edited or in some cases need to be re-recorded. Adobe Captivate 3 takes an entirely different approach to capturing your computer screen which has some real benefits. Adobe Captivate 3 captures individual screen shots only when you move the mouse, click on the screen, or type some text. When you are finished capturing your screens Adobe Captivate 3 pulls all of the screen shots together and builds a Flash video of your demonstration. You also have the opportunity to add audio to your demonstration while you are creating your video or after the process is complete. One of the really nice features of Adobe Captivate 3 is the ability to not only create demonstration-but you can in one fell swoop also create simulations, training, and assessment videos. You can watch my screencast to get an idea of how Adobe Captivate 3 works.
I have found that using Adobe Captivate 3, I can create custom demonstrations videos very quickly, with Adobe Captivate 3 doing a lot of the work for me. What do I mean by that? When I am creating a video demonstration Adobe Captivate 3 will automatically include captions when I am selecting menus, dialog boxes and clicking on the screen. Watch the video to see what I mean. In the demonstration video you will see a number of captions that have been generated by Adobe Captivate 3. All of the captions can be edited and formatted if you need to. Having Adobe Captivate 3 generate the captions saves a lot of time when producing these videos. I have chosen not to use audio in this demonstration but if I wanted to I could always go back and add narration to the demonstration video. As I work with Adobe Captivate 3 I I find it an outstanding tool to work with to create video demonstrations and training scenarios. I will over the next couple of weeks share with you some other tips and tricks that I have learned about Adobe Captivate 3 - so stay tuned.
No comments:
Post a Comment